
Languages & Translation
RJ Nexus allows you to manage multiple languages, change the admin and frontend locales, translate your content, and fully customize the translation strings. This guide covers everything from adding a new language to using the built-in translation editor.
1. Accessing Language Settings
Step 1 — From the admin sidebar, navigate to Settings.
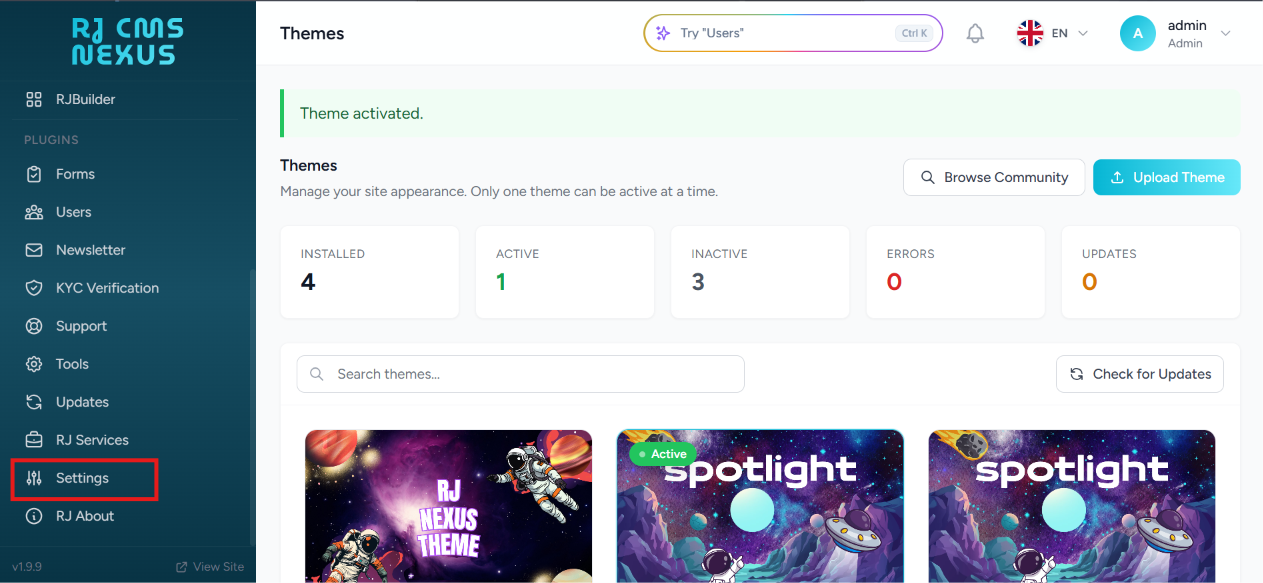
Step 2 — In the settings grid, locate and click on the Language card.
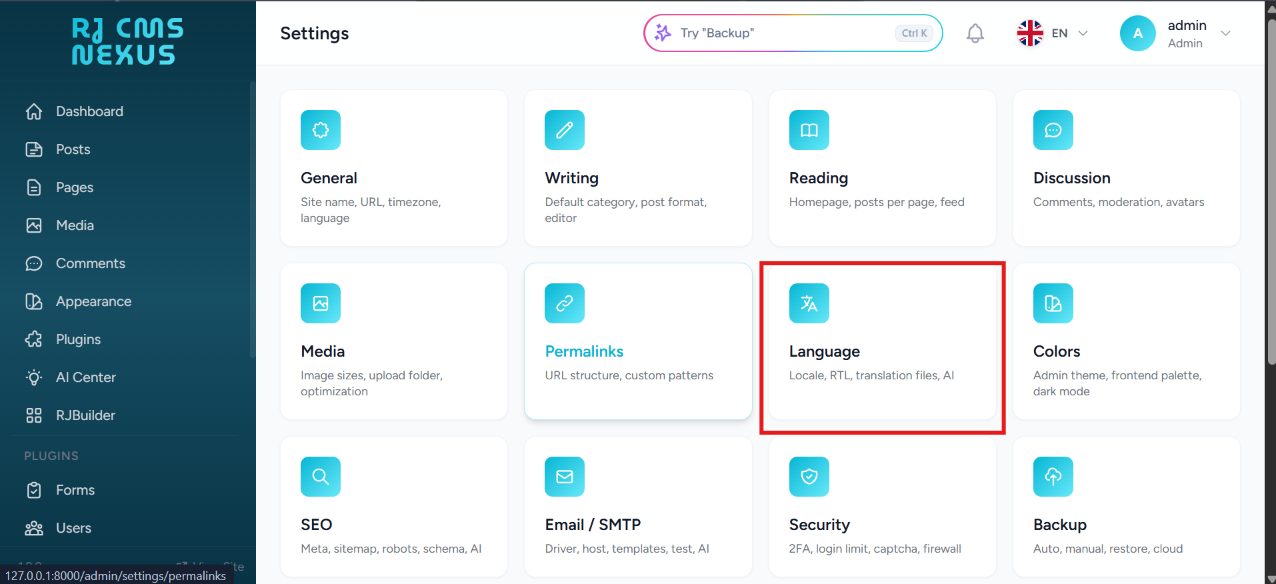
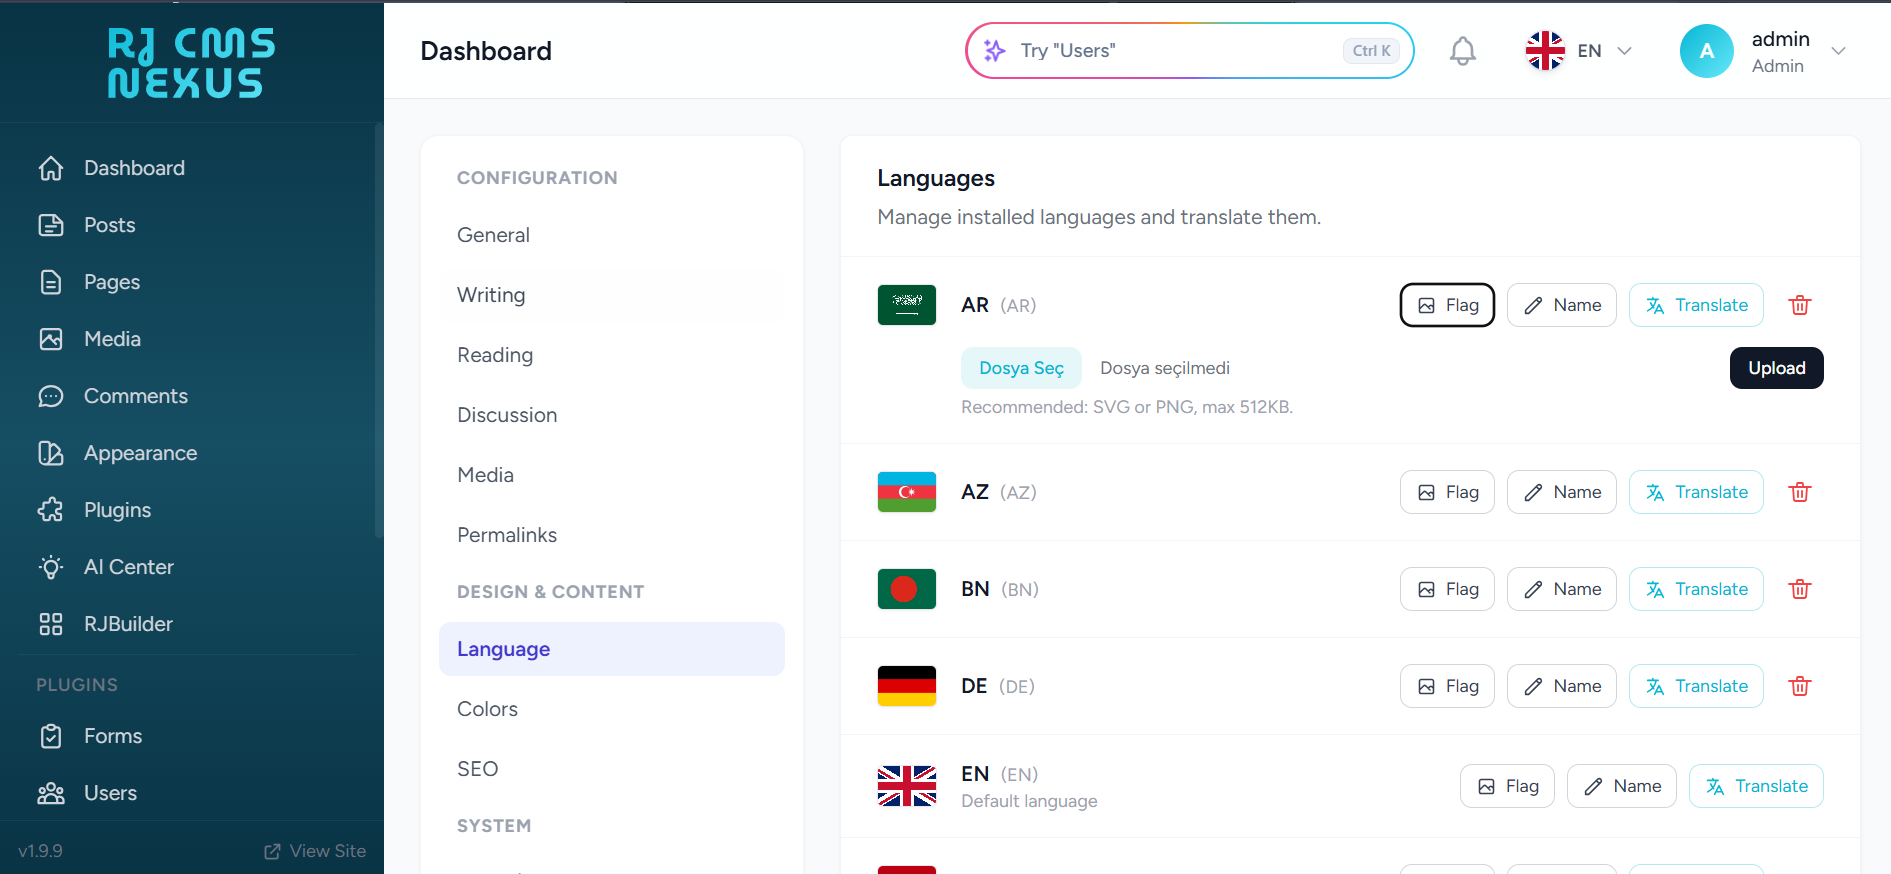
Step 3 — This opens the main Language management screen.
2. General Language Settings
At the bottom of the Language screen, you will find the core configuration options.
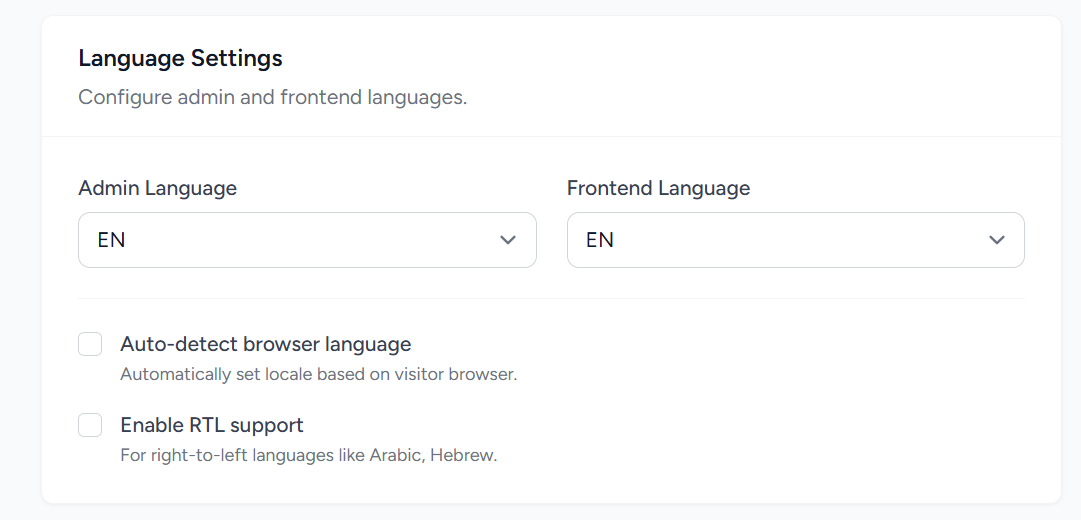
- Admin Language: Sets the default language for your admin panel.
- Frontend Language: Sets the default fallback language for your public site.
- Auto-detect browser language: If enabled, the system automatically sets the locale based on the visitor's browser language.
- Enable RTL support: Automatically applies Right-to-Left layout direction for languages like Arabic, Hebrew, Persian, and Urdu.
3. Managing Languages
Add a New Language
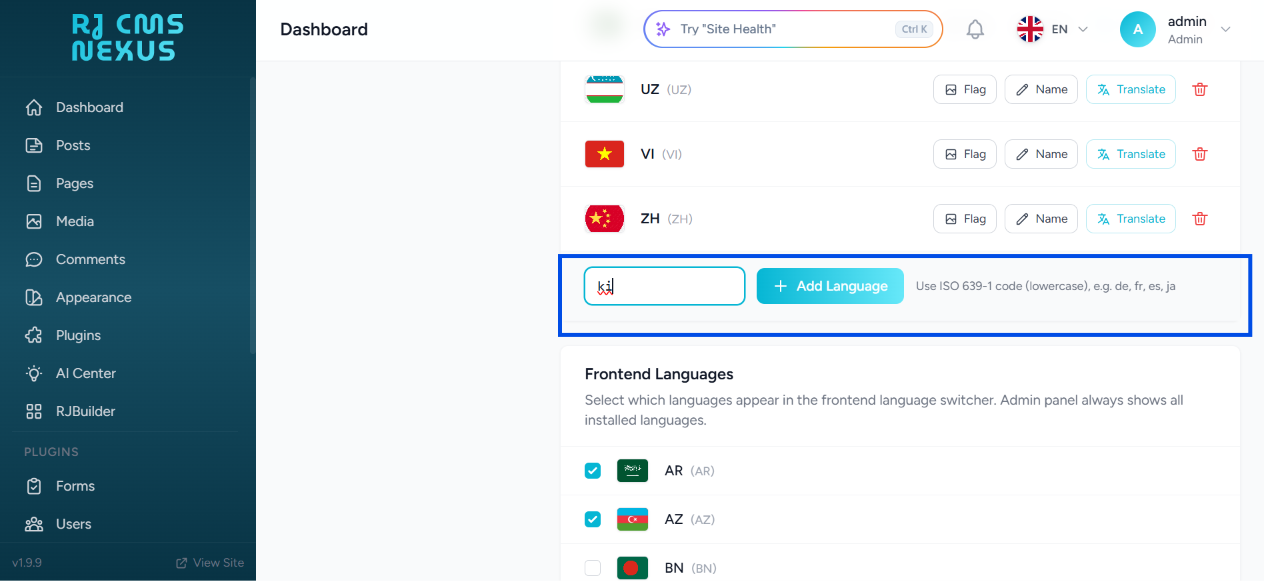
You can add a new language to the system by clicking the Add Language button.
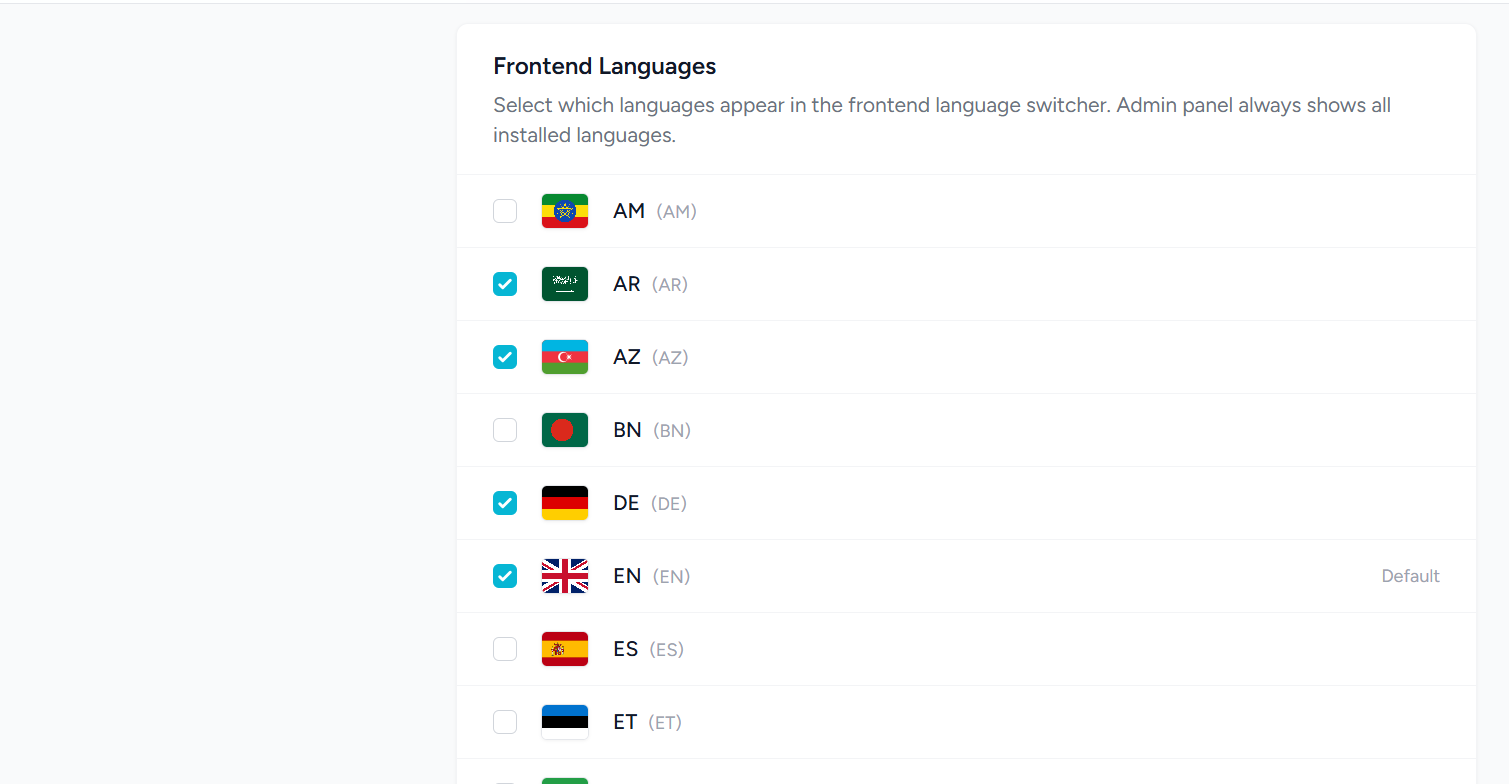
Select Frontend Languages
Choose which languages are visible to your visitors on the frontend. Only the selected languages will appear in the frontend language switcher.
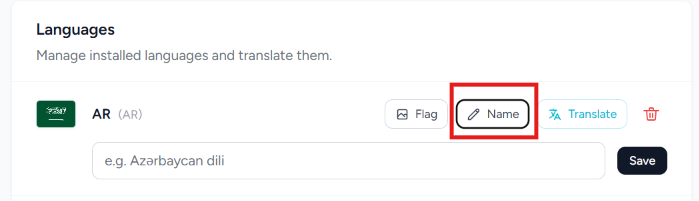
Edit Language Name
You can rename the languages to fit your site's needs.
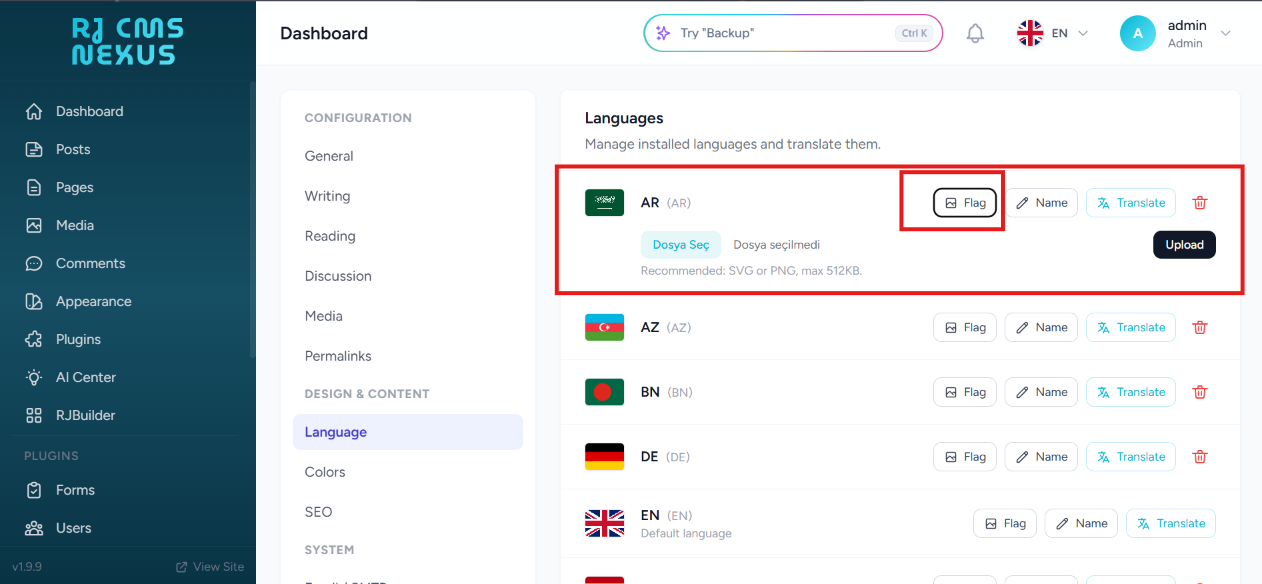
Change Language Flag
You can change the country flag associated with a language by uploading a new icon.
Delete a Language
System languages can be deleted using the trash icon next to the language.

4. Using the Translation Editor
To translate the static strings (UI text) of your site, click the Translate button next to any language.

AI Translation Setup
At the bottom of the language settings, you will find the AI Translation option.
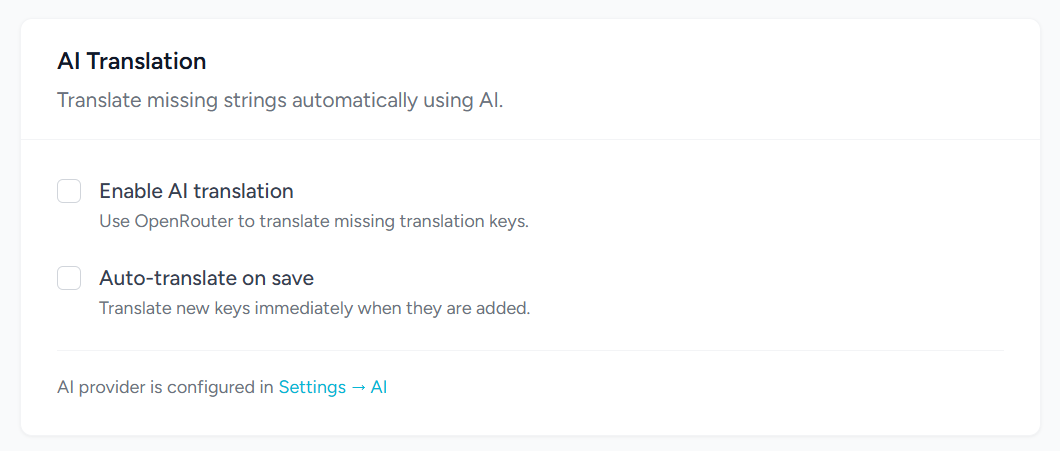
Important: The Auto Translate feature requires an OpenRouter API key to function. If you haven't set it up yet, follow the AI Setup (OpenRouter) guide.
The Translation Screen
When you open the translation editor, you will see a detailed interface. Here is a breakdown of the 5 colored areas:
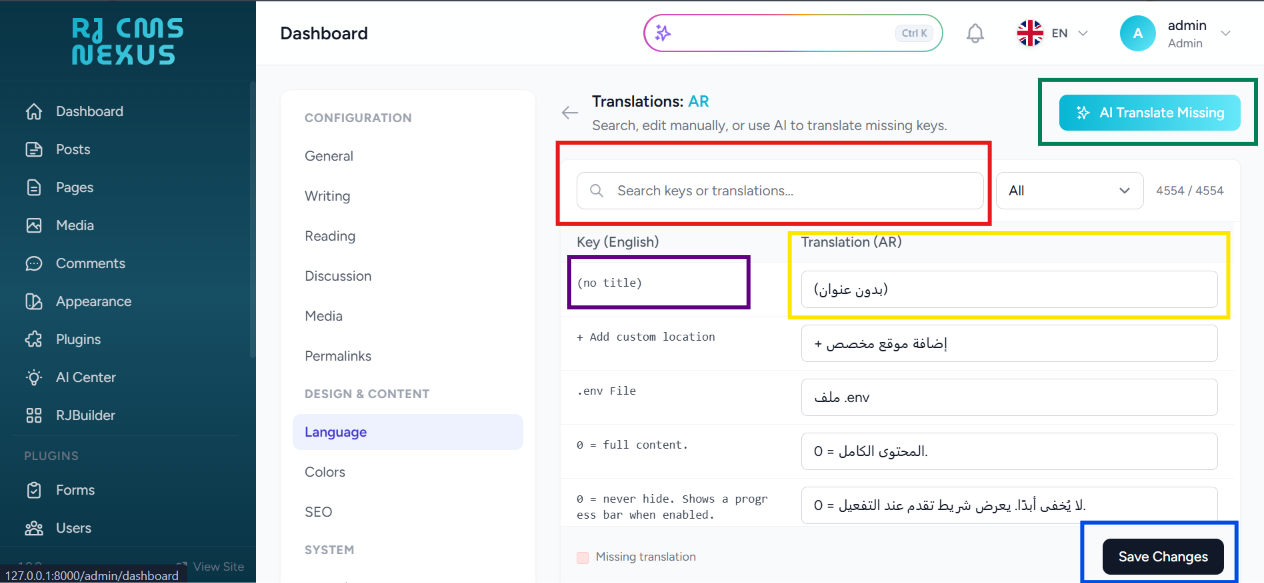
- Green Box (Auto Translate): Click this to automatically translate missing strings using AI. (Requires OpenRouter setup).
- Red Box (Search): Use this search bar to find specific keys or translations. You can search in any language to quickly locate and edit a string.
- Purple Box (Keys): These are the original strings or keys that need to be translated (usually in English).
- Yellow Box (Strings): This is where the actual translation goes. Edit the text here to change what the user sees.
- Blue Button (Save): Click this button to save all your changes to the translation files.